![5e7383edff0f8e6e3c4967b0_sw-logo-black-1.png]](https://help.syncwords.com/hs-fs/hubfs/5e7383edff0f8e6e3c4967b0_sw-logo-black-1.png?height=40&name=5e7383edff0f8e6e3c4967b0_sw-logo-black-1.png)
When you add a translation in Step 4: Translation, you can configure two types of outputs for each translation language: Subtitles (translated text on screen) and Dubbing (AI-generated audio in the target language).
IMPORTANT: Subtitles must be enabled for Dubbing to work. Since subtitles are enabled by default when you add a translation, you only need to toggle on Dubbing if you want audio translations as well.
Configuring Subtitles
Subtitle settings for each translation language include:
- Language - Choose the regional variation of the target language
- Translation Engine - Select your preferred AI translation engine
- Glossary - Apply a custom translation glossary for consistent terminology
- Latency Mode - Control the balance between translation speed and quality
- Output Label - Add a custom label for HLS outputs (if enabled)
For detailed instructions on configuring subtitles, see Step 4: Translation - How do I enable Translation for my Service?.
Configuring Dubbing
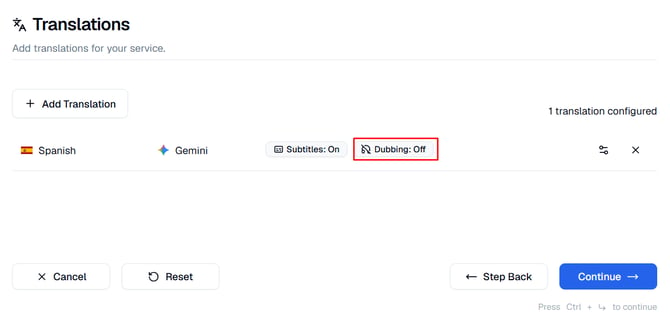
- To begin, navigate to Step 4: Translation of the Create Service Wizard
-
Click the Dubbing Settings option to access the Translation Settings modal.
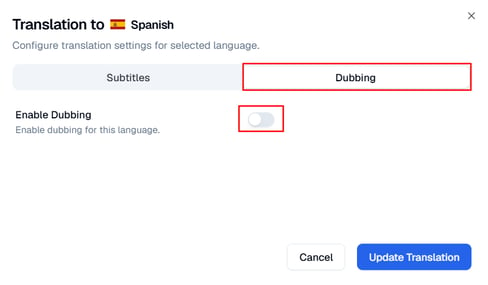
- In the Translation Settings modal (Dubbing), toggle Enable Dubbing to turn on AI audio generation for the selected translation language. When enabled, you can configure additional voice and playback options for the dubbed output.
- Choose how AI voices are used in your dubbed translation. There are three available dubbing modes: Single Voice, Dynamic Voice and Cloned Voice.
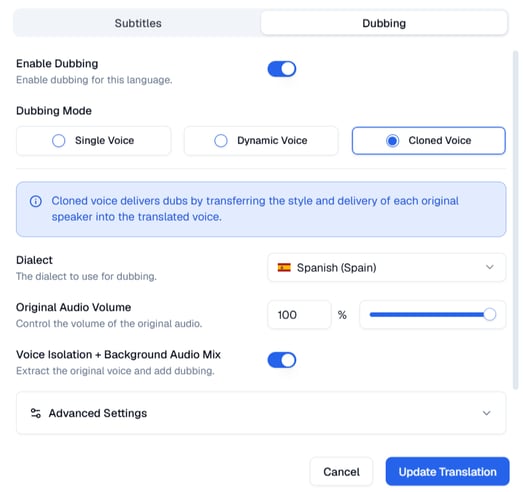
- Configure your Dubbing settings
- Click Update Translation to save your settings
- Repeat for each translation language you want to customize
- Click Continue to move to the next step of the wizard
- Please see Step 4: Translation - How do I enable Translation for my Service using the new UI? for more information
NOTES:
-
Not all languages are available via Dynamic or Cloned Voices.
- Please see What languages can I translate to? article for a list of languages supported.