Step 1 - Set up your stream on Castr
-
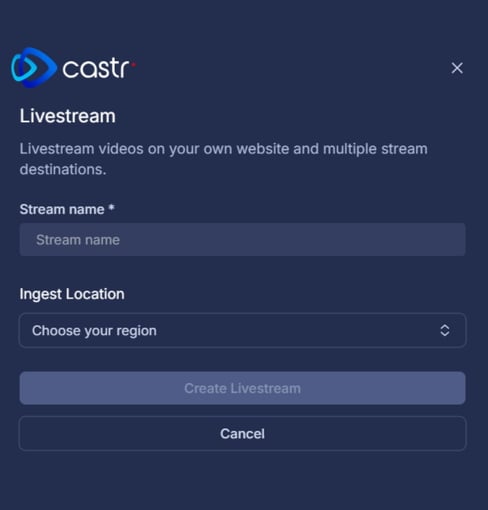
In Castr, click on Livestreams on the left and then the Create New button.

-
Stream name: Give your stream a name
-
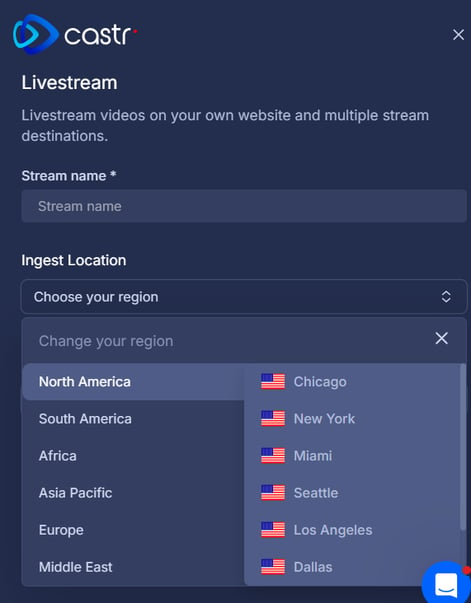
Ingest Location: Select the region closest to your broadcast and then click Create Livestream to create your livestream.
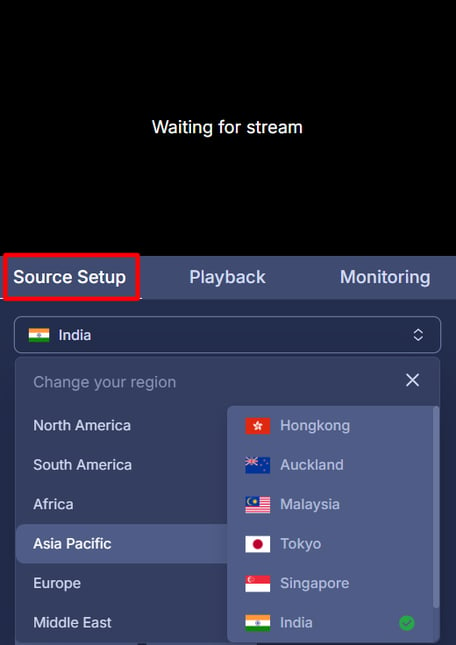
- Once the Livestream has been created, you can change the assigned region at any time by clicking Source Setup beneath the preview window on the right and selecting the desired region.
-
In the livestream, go to Settings > Player Functions > Turn on Enable Caption Support.
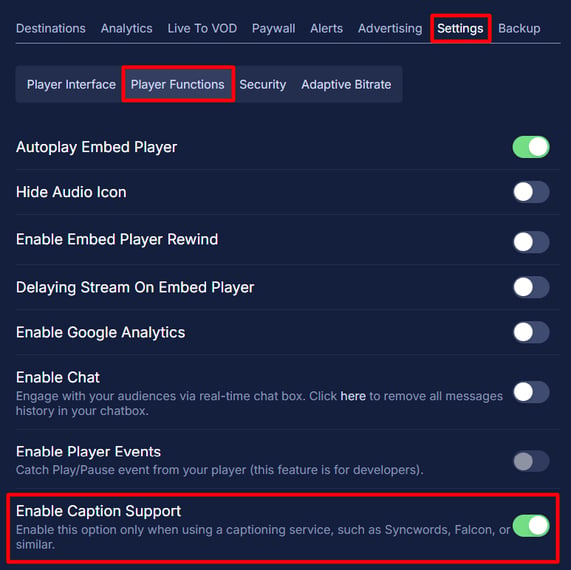
WARNING : If Enable Caption Support is not turned on, the captions will not show up in your stream.
-
From the Playback tab, under Normal, grab the HLS URL (M3U8 link) to paste into the HLS URL field under “Input Media” on SyncWords Live.

Step 2 - Provide Input Media
- In SyncWords, create a new service or navigate to your existing service configuration. Please see Step 2: Input Media (HLS) - How do I use HLS as an Input source for my Service using the new UI? for more information.

- In your SyncWords Service configuration, navigate to the Input Media section
- Stream Type: Select HLS
- Delivery Method: Select PULL
- Stream URL: Paste the M3U8 link you copied from your livestream in Castr. Replace the domain portion of the URL with https://sync-cas771.castr.io/edge
- Click Continue or Save Changes
IMPORTANT:
- Encoder: x264
- Rate control: CBR or Constant Bitrate
- Keyframe Interval: 2
- Bitrates and Resolution:
- For 720p:
30fps with average bitrate of 2500 to 4000 kbits/sec
60fps with average bitrate of 3500 to 5000 kbits/sec - For 1080p:
30fps with average bitrate of 3500 to 5000 kbits/sec
60fps with average bitrate of 5000 to 6500 kbits/sec
- For 720p:
- Audio Bitrate: 128 kbits/sec
Step 3 - Set up Transcription
Configure the transcription settings to create captions from your live stream audio.
Please see Step 3: Transcription - How do I enable Transcription for my Service using the new UI? for more information.
Step 4 - Set up Translations
If you need translations, you can add real-time AI text translations and audio dubbing to your live stream.
Please see Step 4: Translation - How do I enable Translation for my Service using the new UI? for more information.
Read our article on How to Setup Audio Translations for more details.
Step 5 - Set up the Output
The last step is to set up the output that will go back out to your Castr HLS stream with the captions, text and audio translations included. 
- In your SyncWords Service configuration, navigate to the Outputs section
- Stream Type: Select HLS
- Delivery Method: The default PUSH will be automatically selected
- Destination: Select "S3 Bucket" from the dropdown
- Bucket Name: Enter castr-sync
- Path: The “Path” will come from your Castr livestream HLS URL. Copy the segment between the domain and the index.m3u8 in your Castr HLS URL. Make sure you do not include the / at the start or end of the path.
For example, if the URL is as follows, copy only the segment that is in bold and paste it into the “Path” field - https://stream-hls.castr-cdn.com/xxxxx/live_xxxxx/index.m3u8 (do not include the / at the start or end of the path) - AWS Region: It must be set to US East (N. Virginia) us-east-1
- Multivariant Manifest Name: Enter index.fmp4.m3u8
- Buffer: Set the buffer time in seconds
- Click Continue or Save Changes
IMPORTANT: When you are ready to stream, make sure that your input stream has started on Castr before you start your Service on SyncWords.

Step 6 - Get the player from Castr
-
Go back to your livestream you set up in Castr and copy one of the two options in the Playback tab. You can select between an iFrame embed code or the Direct Player Link with the HLS player.
-
Add ?syncwords=true to the end of CASTR’s player link URL or the iFrame URL to enable the Captions and Dubs in the player.

-
Add the player where your attendees will be viewing, and once you start your stream and the SyncWords Service, let them experience synchronized captions, subtitles and audio translations in real-time.
WARNING: You must start your SyncWords Service in order for it to accept incoming streams and deliver an output.