A SyncWords Service is a cloud-based live streaming transcription and translation pipeline specifically designed for broadcast and OTT workflows. Each Service represents a dedicated live streaming channel that can process real-time audio and video feeds using streaming protocols such as SRT, RTMP, HLS, or CMAF-Ingest.
To begin, go the Services Page and click the "Create Service" button near the top right hand side of the page.

This opens our new Create Service Wizard. The first step in the Wizard is to define the basic details of your new Service. These settings help you identify and organize your Service within the platform.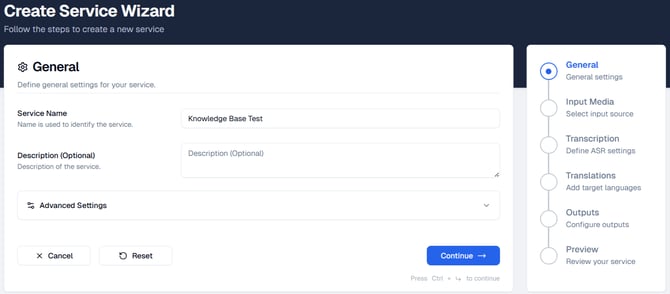
Service Name: Enter a name for your Service. This is how the Service will appear throughout the platform, so choose a clear and descriptive name that makes it easy to recognize.
Description (Optional): Use this field to provide additional information about your Service. While optional, adding a description can be helpful when multiple users or teams are managing Services.
Advanced Settings: Additional configuration options are available in the Advanced Settings section. Details about these optional settings are listed below
NEXT STEP: Once you’ve entered the required information, click "Continue" to move to Step 2: Input Media for HLS, SRT, RTMP or CMAF where you will choose the input source for your Service.
Navigation Options
At the bottom of the screen, you will see the following actions:
Cancel - Cancels the creation of your Service and exits the wizard.
Reset - Clears all fields and settings in the Wizard so you can start over.
Continue - Moves to the next step of the wizard once the required fields are completed.
NOTE: If you click off the Wizard without Resetting or Canceling your inputs will be saved and you can return to complete the setup later.
Your Service is not created until you have been through all 6 steps and clicked the "Create Service" button.
Advanced Settings
To access the Advanced Settings, click the Advanced Settings dropdown on the page. This will expand the section and display additional configuration options.
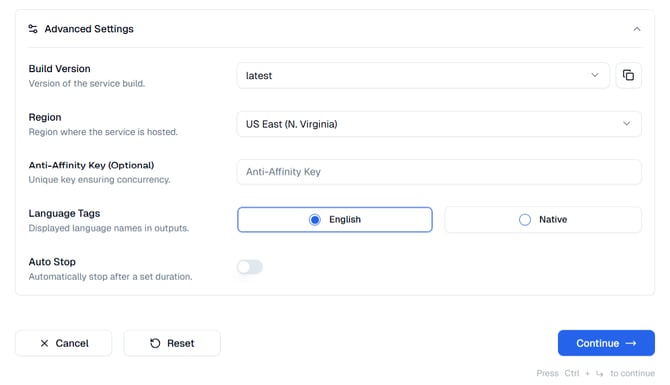
WARNING: The build version can only be set when creating a Service. You will not be able to change it later.
Anti-affinity key: A unique string that can be used in two Services to ensure that they run concurrently in different data centers for resiliency and redundancy. Enter the same value in this field on two different Services to ensure they are deployed in separate availability zones on the same instance.
Language Tags: Specify how language options are labeled in manifests and streams. They can appear in English, their native language or a custom value. For example, the tag can display as “Spanish” or “Español”.
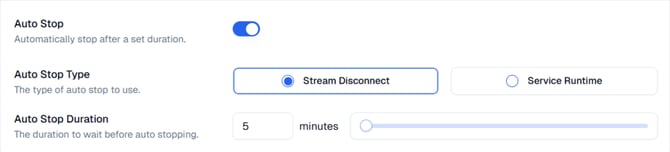
Auto Stop: Allows you to automatically stop a Service without manual intervention. This can help prevent Services from running longer than intended. Toggle this setting "On" to enable automatic stopping for the Service.
- Stream Disconnect: The Service will stop after the incoming stream has been disconnected for a specified period of time.
- Service Runtime: The Service will stop once it has been running for the set duration.