During the Input Media step you can select the type of stream that is used as the source for speech recognition and the video stream output. In this step, you will configure CMAF as your input media source. This determines how your live stream is received by the Service for processing. For a list of all steps see our Service Wizard Steps below.

Stream Type: Select CMAF as your stream type.
Delivery Method: Choose how your input stream will be delivered. For CMAF input, only PUSH is available.
CMAF PUSH
Use this option when your encoder or streaming software will push the live stream directly to SyncWords using the Common Media Application Format (CMAF). CMAF is a modern streaming format that provides low-latency delivery and is designed for compatibility across multiple platforms and devices.
After selecting CMAF Push, the system will generate the streaming URL. Use this URL to send your live stream to the platform.
IMPORTANT: The streaming URL will be available once the service is fully saved and configured.
NOTE: CMAF push is supported by modern encoders including AWS Elemental Live and encoding services like AWS MediaLive. Verify that your encoder supports CMAF output before selecting this option. Legacy encoders may only support HLS or RTMP.
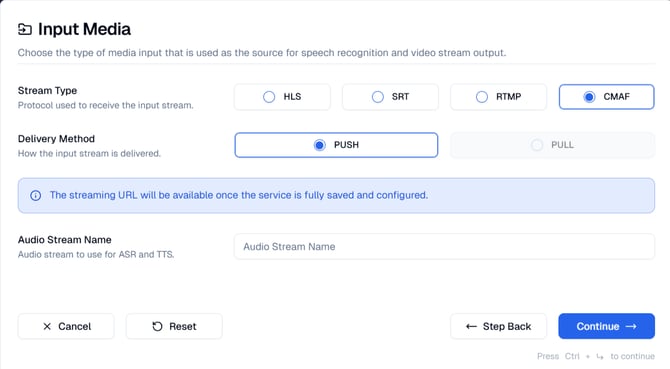
Audio Stream Name: Enter the name of the audio stream to use for ASR (Automatic Speech Recognition). This field identifies which audio track from your CMAF stream should be processed for transcription.
How to find your audio stream name:
-
Check your encoder's CMAF output configuration for the audio track name or label.
-
Common examples include: "audio", "audio_0", "en", "main", or language codes like "eng" or "spa".
-
If your stream has multiple audio tracks (e.g., different languages), specify the name of the track you want transcribed.
TIP: If you're unsure of your audio stream name, check your encoder's configuration or CMAF manifest. Contact support if you need help identifying the correct stream name.
NEXT STEP: Once you’ve entered the required information, click "Continue" to move to Step 3: Transcription where you will enable AI Transcription (ASR) for your Service.
Navigation Options
At the bottom of the screen, you will see the following actions:
- Cancel - Cancels the creation of your Service and exits the wizard.
- Reset - Clears all fields and settings in the Wizard so you can start over.
- Step Back - Returns to the previous step if you need to modify earlier settings.
- Continue - Moves to the next step of the wizard once the required fields are completed.
NOTE: If you click off the Wizard without Resetting or Canceling your inputs will be saved and you can return to complete the setup later.
Your Service is not created until you have been through all 6 steps and clicked the "Create Service" button.
Service Wizard Steps