In this step, you will review all the settings configured for your service before finalizing and creating it. For a list of all steps see our Service Wizard Steps below.
The Preview page provides a complete summary of your service configuration, allowing you to verify your settings prior to launching: General Info, Input Media, Transcription, Translations, Outputs, and Advanced Settings.
General Info
Review the basic information defining your service in Step 1.

Service Name: The name assigned to your service during setup.
Description (Optional): This shows the description of your service.
Input Media
Displays the input configuration you selected in Step 2.

Input Stream Type: Shows the chosen protocol and delivery method (e.g., SRT Pull, SRT Push, RTMP, etc.).
Stream URL: The stream endpoint provided or entered during setup.
Transcription
Summarizes all transcription-related settings selected in Step 3.
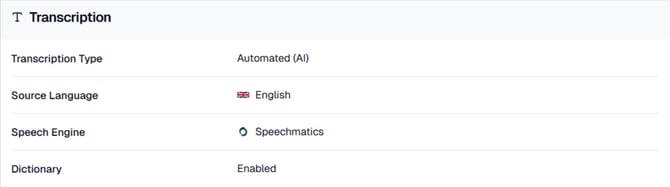
Transcription Type: Automated (AI) or 608 Connection.
Source Language: The language spoken in your input media.
Speech Engine: The AI speech recognition engine used for transcription.
Dictionary: Indicates whether a custom dictionary has been applied.
Translations
Lists all configured translations, whether subtitles or Dubbing in Step 4.
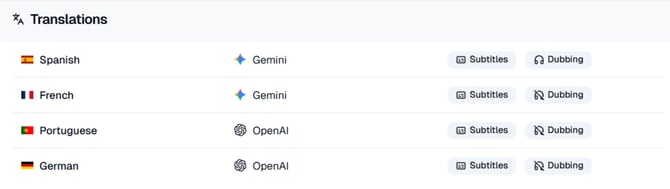
Each translation entry includes:
-
Target Language
-
Translation Engine (e.g., OpenAI, Google, Gemini, Nova)
-
Modes Enabled
-
Subtitles
-
Dubbing
-
You will see a row for every translation that has been added.
Outputs
Summarizes output delivery settings configured in Step 5.
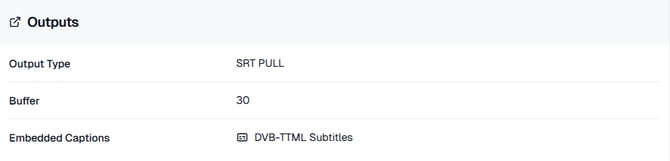
Output Type: Shows the chosen protocol and delivery method (e.g., SRT Pull, SRT Push, RTMP, etc.).
Buffer: The buffer duration applied to the output stream.
Embedded Captions: Indicates whether captions/subtitles are embedded (e.g., 608, DVB-TTML) or disabled.
Advanced Settings
Displays any advanced options applied at the service level.
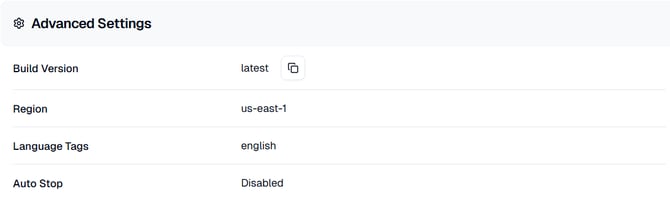
Build Version: Version of the processing pipeline being used.
Region: Deployment region for your service.
Language Tags: Custom or default language tags applied to the service.
Auto Stop: Whether the service will automatically stop when idle.
NEXT STEP: Once you’ve reviewed all settings click the "Create Service" button to finalize setup and start the service. This will take you to your newly create service where you will receive all the required connection details.
If you want to make any edits you can click the Step Back button or select the section you want to edit from the right side bar.
Navigation Options
At the bottom of the screen, you will see the following actions:
- Cancel - Cancels the creation of your Service and exits the wizard.
- Reset - Clears all fields and settings in the Wizard so you can start over.
- Step Back - Returns to the previous step if you need to modify earlier settings.
NOTE: Your service is not created until you have been through all 6 steps and clicked the "Create Service" button.
